Among the proteins most commonly used in shredded form, chicken is undoubtedly the most popular. Its nutritional benefits, flavor, and cost-effectiveness mean that shredded chicken is used in various dishes around the world.
In this article, we will cover all the steps involved in producing shredded chicken: from the cuts used to the shredding process.
The most commonly used cuts are breast and fillet. When deciding which one to use, the price is taken into account, as well as the desired end result.
In terms of price, it varies from region to region. In some regions, the fillet is more affordable, while in others, breast meat is.
As for the final result, breast meat produces longer shreds, while tenderloin produces shorter shreds.
The cooking stage is essential for shredding to be done correctly. The most commonly used cooking methods are: pot/cauldron of boiling water (without pressure); pot/cauldron of boiling water (with pressure); combination oven; sous vide.
Cooking should reach a point where it is possible to separate the chicken fibers, so cooking time is very important. Below are suggested cooking settings for each of the methods mentioned above.
| Chicken Breast | Chicken Fillet | |
| Pot/cauldron of boiling water (non-pressure) | Leave for 2 hours (add only after the water has started boiling). | Leave for 1.5 hours (add only after the water has started boiling). |
| Pot/cauldron of boiling water (pressure cooker) | Leave for 1 hour. | Leave for 45 minutes. |
| Combi Oven | Temperature of 110ºC, humidity at 100%, and time of 30 minutes | Temperature of 110ºC, humidity at 100%, and time of 27 minutes |
| Sous Vide | Temperature of 78°C, time of 2 hours | Temperature of 75°C, time of 2 hours |
Defining the cooking method: it is important to take into account the yield of each method as well as the profitability of the final result. Sous Vide and Combination Ovens have a higher yield, but the most commonly used methods are industrial pressure cookers (with/without pressure).
This step in the process will determine the final quality of the shredded chicken. Ideally, this step should be performed with the chicken hot, immediately after cooking. There are many types of equipment and techniques, but we will cover the main ones here.
Mixers/processors: This equipment breaks down the fibers through high exposure, simulating shredding. By breaking down the fibers, the shredded meat becomes more compact, sometimes similar to dough. This result is ideal for fillings in small products, such as snacks. Due to their more affordable cost, these machines are widely used.
Manual shredding: due to the inferior quality of the shredding produced by dough mixers/processors, many end up opting for manual shredding, where it is possible to separate the fibers. This can be done either by hand or by using pots and stirring them so that the fibers come loose. This method has the highest labor cost.
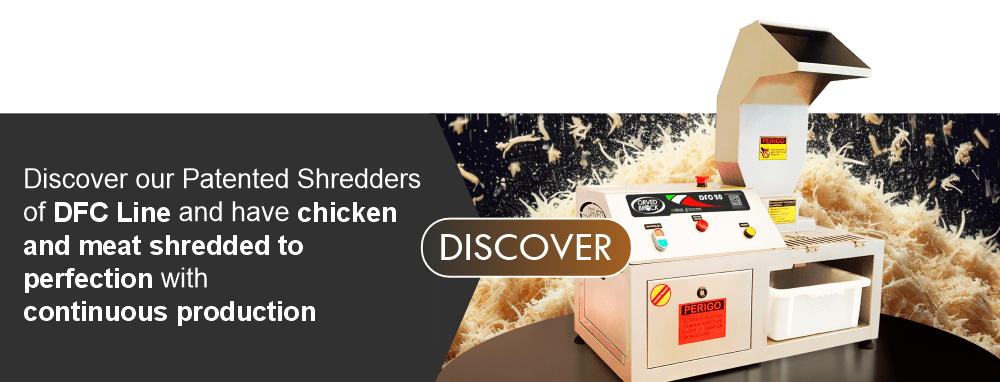
Shredders of DFC Line: have a system that correctly separates the fibers, achieving the best possible shredding (higher quality than manual shredding). With continuous production, they optimize all labor related to the process. These machines have a higher cost and are recommended for shredding 20 kg or more of chicken per day.
If the chicken is not to be used immediately, pay attention to the product’s shelf life.
Refrigerated (non-vacuum packed): The shelf life is 3-4 days.
Frozen (non-vacuum): The shelf life is up to 90 days, but because it is not vacuum-packed, ice crystals form, which impairs the quality of the product.
Vacuum storage is recommended, as it extends the shelf life of refrigerated products to 10-15 days and frozen products to up to 1 year (without compromising quality).
Would you like to get in contact with Orved Brock to know more about the patented meat and chicken shredders? Reach us via phone: +55 85 98793-6777, e-mail: vendas@orvedbrock.com.br or WhatsApp.
